Excel Add-In
FAQ: Find the answers to your questions
We have collected the frequently recurring questions about the Excel Add-in for your convenience.
Installation
To download and install the add-in: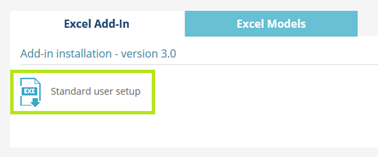
- In the Help Center, click the Downloads button.
- In the Excel Add-In tab, click Standard user setup under Add-in installation – version 3.0 to download the add-in installation package.
- Double-click the downloaded file to start the installation.
- Close Excel to complete the installation. The installer will automatically re-open Excel once the installation is completed.
Notes
In the setup program, it is recommended to keep the default Destination Directory where the add-in is installed. If you want to change it, make sure to select a directory with read and write permissions.
The Infront Excel add-in can't be installed on Windows Terminal Server
The Infront Analytics add-in does not run natively on macOS. In order to use it, you need to get Windows running on your Mac.
There are multiple options for running Windows on a Mac. Every Mac comes with Apple Boot Camp software, which helps you install Windows into a separate partition. To switch between operating systems, you need to restart your computer. In addition, you cannot run macOS applications and Windows applications side-by-side at the same time.
Another option is to run Windows as a guest operating system in a virtual machine, using a program such as Parallels. This is convenient because you do not have to restart your computer to switch over to Windows. Instead, Windows runs in a macOS application window.
In both cases, you will have to acquire the Windows and Office software licenses.
When the add-in is run for the first time, you are prompted to activate the automatic loading of the Infront Analytics add-in at Excel startup.
To view or change this setting, click Options in the Infront Analytics ribbon.
Automatic loading is activated when the Load Add-in at Startup option is checked.
In case of problems, you can double-check if the add-in Effull is checked in the Excel add-in list (click File > Options > Add-ins, then Go).
Auto-upgrade
Please note that starting from version 3.0.16, the Add-in is set by default to automatically upgrade to the latest version. A Windows notification appears each time a new version is available for upgrade.
We strongly recommend to uninstall any older version.
You can disable the automatic upgrade functionality by simply unchecking the Automatic update option from the Data Engine menu on the Settings window.
Manual upgrade
You have the below three options to manually upgrade to the latest version of the Excel Add-in:
Checking for updates
From the Infront excel menu click on Help Center then click on Check for Updates from the About window, it will automatically upgrade the Add-in to latest version.
From Help Center
Download the latest version from the Help Center\Downloads or directly from here, close Excel then install the Add-in.
From Infront Terminal
If you’re using the terminal, you can use the Excel command (CMD) then the Install Excel Add-in link (LNK) to download the .exe package and upgrade.
Compared to version 2.0, version 3.0 of the Infront Analytics Excel add-in brings some major benefits:
- Simplified ribbon with fewer options for better identification of key functionalities.
- New Quick report and Time series wizards designed to facilitate the creation of bespoke models.
- New Quick Report table formats offering more flexibility in model design.
- New Functions module that help to retrieve a lot information in a simple and easy way
Version 3.x
Go to control panel to uninstall the add-in
Version 2.1
Type "Uninstall Infront Analytics" in the Windows Start menu and select the application Uninstall Infront Analytics Excel Addin.
Alternatively, you can open the Start menu and search for the uninstall application in the folder Infront Analytics Excel Add-in 2.1.
