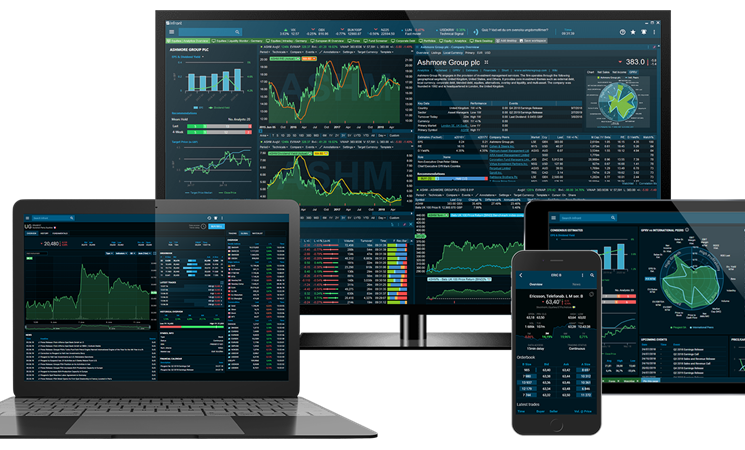
Infront Professional Terminal
FAQ: Find the answers to your questions
We have collected the frequently recurring questions for you in the areas of "Installation and Start up", "Getting Started - Settings and Workspace", "Trading", "Excel", "API" and "Packages and Prices". If you don't find the information you were looking for, don't hesitate to contact our Customer Service Team.
Installation and Start up
These are the minimum requirements:
- Operating System: Windows 7/8/10
- Processor: 2 GHz Intel or more
- Internal Memory (RAM): 4096MB or more
- Screen: 1024x768 resolution (1920x1024 or higher will offer the best experience)
- Monitors: The program can run on one or multiple monitors
- Hard Disk: approx 100 MB required for the program
- Internet Connection: 2/2mbit or higher (depending on data volumes)
Step 1: Download
Download the Infront Professional Terminal and install on your computer. If you are running an anti-virus program, we recommend you to turn off the program while downloading the Infront terminal.
Step 2: Install
Once the download is complete, the installation process will start automatically. You will receive a “Security Warning” asking if you accept the application from Infront. To continue, select Yes. Press «Next» to complete the installation.
Step 3: Enter your Account Details
Type in your username and password. This information can be found in the e-mail you received from Infront, or from your broker.
You are all set!
Infront continuously introduces new features and bug fixes, to make your experience with the Infront Professional Terminal even better. We encourage you to upgrade to the latest version.
The latest version of the terminal is available for download on Infront's website.
Note: as of version 7.1, whenever the Infront Professional Terminal launches an update to it’s software, it rolls out the update automatically.
The Infront Professional Terminal provide two different installers, the EXE installer and the MSI installer.
EXE: This is the installer used by most users – who want to install the Infront Professional Terminal on their own computer. The user does not need to be an administrator in order to install the software.
The EXE installer can be found here.
MSI: The MSI installer is only available for download from the web. This is not an installer that normal users should use (although it does no harm). It is meant for IT Administrators that need to ”roll-out” the terminal to all their users on a local network. When the MSI installer is run, it appears to do nothing. But it unpacks the (.exe) installer and registers a task that runs it next time any normal user logs on to the machine. Then the (.exe) installer runs, installs as normal and runs the Infront Professional terminal.
The MSI installer can be found here.
- Open file explorer and type in %localappdata%. This should take you directly to your hidden AppData folder.
- Open the folder «Ontrade».
- Here are the backup of the previous version installed on the PC.
- Open the folder for the previus version and run ontrade.exe. Infront now opens the preivous version.
Your firewall is blocking the access to the Infront Professional Terminal. In order for the Infront Professional Terminal to work properly, you have to make sure that all the ports and IP addresses are open.
The following IP addresses and ports are in use by the Infront Professional Terminal and need to be opened in customer firewalls.
Follow instructions below:
- Click OK on the Error message
- Click on the three dots to the upper right corner of the desktop
- Click on Settings → Open Advanced Settings
- Change to any of the ports below
- Click OK and restart the Infront Professional Terminal
Ports and protocols
80/tcp
443/tcp
11111/tcp
40000/tcp
IP Addresses Used by Infront
The below outlined IP address ranges and ports are in use by Infront software, and needs to be opened in the client’s firewall settings. Please note that only one of the outlined ports below need to be opened in the firewall settings, not all of them. For this to work, you would need firstly to white-list *.infrontservices.com (* = all).
Go thereafter to settings then open advanced settings:
- Under the Login Server section, tick off the Use DNS names, press OK, exit and restart.
- If this does not work, set Web sockets to force, press OK, exit and restart.
- If this does not work, set Web sockets to force (secured), press OK, exit and restart.
Internet
82.99.29.128/25
82.99.14.192/26
37.122.251.0/25
The reason to having several IP addresses, is because we believe that we should have as many as possible inter-chained links between the client and the source. Adding thus a so-called load-balancer on top of the server environment will add another link in the chain, consequently making it less secure. Infront’s environment is currently running on several locations, whereby the switchover mechanism is built into the client.
Additional connectivity options are available. Please contact support if the above does not work.
You have the correct login information, but you are not able to log in. Follow the instructions below:
Step 1: Click OK on the error message.
Step 2: Click on the Settings menu (the three dots to the upper right corner of your desktop). Then click on Settings.
Step 3: Remove all the information in the “username” and “password”- field. Let it be empty.
Step 4: Restart the Infront Professional Terminal. Once the Infront Professional Terminal opens, you will be able to type in login information in a login window. This information is found in the e-mail you received from Infront or from your broker.
We recommend you to turn-off any anti-virus program while installing Infront terminal. Below you will find solutions for the most commonly used anti-virus programs:
Avast
- Right-click on the Avast orange icon in the Windows system tray.
- Select Avast shields control and select how long you want to disable it.
- Confirm by select Yes in the dialog window.
AVG
- Open AVG Anti-Virus.
- Open the option menu and click on “Components”.
- Turn off “File shield” and “Behaviour shield”.
Windows Defender
- Open Windows Defender.
- Go to "Protection for Virus".
- Turn off "realtime shield"
- Open the Infront Professional Terminal. The terminal now should work as normal.
Yes! While the Infront terminal is delivered in English by default, it is possible to translate the user interface into any other language supported by Microsoft Windows. This guide explains how to do it.
Getting Started
The Infront terminal is delivered in English by default. It can however be translated in to any other language as long as this is supported by Microsoft Windows. A file containing approximately 3000 words and phrases must be translated. Estimated time usage is 3 effective working days including testing. It is very important that the person that does the translation have a good knowledge about the financial equity markets and order entry.
Required Software
In order to translate, the translator must install a program called poEdit (or similar text editor program) and translate a file called default.po.
Getting Started- Settings and Workspace
Step 1: Use the «Main Menu» and «Find anything» field to search for instruments, windows, lists etc.
Step 2: Right-click on the toolbar to personalize widgets.
Step 3: Use the Help menu for support, shortcuts, user guide etc. Use the «Favorites» menu to easily access your favorite windows or lists. Use the «Alerts and notification» to manage your alerts. At last, use the «Settings» menu to change settings, access «My Profile» and Workspaces.
Step 4: Add a blank desktop by clicking on «Add desktop» in the lower left corner. You can easily switch between your desktops by clicking on the desktop tabs in the lower left corner of your desktop. At last, save your workspace by clicking on «Save Workspace» in the lower left corner.
To open a default desktop, follow the steps below:
Step 1: Open an empty desktop in the terminal.
Step 2: Click on “Add Desktop” on the lower left corner of your desktop.
Step 3: Click on the preferable default desktop displayed and click on «Load Desktop» to upload the desktop.
Notice: If you do not have access to the market data displayed in a default workspace, the workspace will appear empty. Please contact Infront or your broker to get the access.
Yes! While the Infront Professional Terminal is delivered in English by default, it is possible to change the language to either Czech, Finnish, French, Hungarian, Polish, Romanian, Russian or Swedish. To do so, follow the instructions below:
Step 1: Go Settings → Open Advanced Settings.
Step 2: Click on User interface → Regional and change language under “Select language"
Step 1: Go to Settings and click on Workspace.
Step 2: Click on Save and your workspace will be saved as a regular desktop in your terminal. Alternatively, click on “Save as default”. This way, every time you open the terminal, the workspace will open by default.
Step 3: The third way to save your workspace, is to save it locally on your PC. Click on “Save As..” under Workspace. Create a name and click on “Save”.
Step 4: A quick way to save your workspace is to click on “Save Workspace” in the lower left corner of your desktop.
Step 1: Open the workspace you want to move.
Step 2: Go to Settings → Click on Workspace → Save As → Give your workspace a name and save it locally on your PC. This is by default stored on your C:\ drive.
Step 3: Attach the workspace file to an email and send, or put it on a USB drive.
Step 4: Save the workspace locally on your second PC from your email or USB drive.
Step 5: Open the terminal on your second PC → Go to Settings→ Click on Workspace → Open → Find your saved workspace and click Open.
Activate the Floating Windows option. To do so, go to Settings and choose «Floating» (Windows can be dragged across multiple screens).
A second way to expand the terminal across multiple screens is to drag the terminal over to another screen.
No, your workspace will not be affected if you upgrade your Infront Professional Terminal to the latest version.
Step 1: Open the window you want to share, for instance, a customized chart.
Step 2: Click on the Settings Menu in the chart.
Step 3: Click on share and Select Copy URL.
Step 4: Paste the URL in an email and send it to your colleagues and friends.
This can be done by typing “preferences” in the search field and go to User interface → General. If you reduce the maximal number of intraday points this can make the terminal faster. From here it is also possible to decrease the maximal number of search results. You can also turn off “just-in-time loading of market data” or turn off “fast page switching”.
Step 1: Go to «Settings» and «Open advanced Settings».
Step 2: Click on «User interface» → «General». Under “Content colors” you can change the “trade ticker coloring relative to” Hitter/taker.
Green shows when a buyer purchases at the Ask price, also called a taker.
Red shows when a seller sell their shares at the Bid price, also called a hitter.
The Infront Professional Terminal can display news, research and other important sources from RSS/XML files. To make a news feed available, the format should follow the format shown in the following example:
The basics
- RSS 1.0 or RSS 2.0 is recommended, however any XML format is supported.
- Each news item must contain at least: timestamp (date + time), title and URL.
- Infront supports text in lieu of URL, industries, categories and topic.
- Find out more about XML from w3.org
Mapping of news to symbols:
A news story can be mapped to a symbol using the ISIN or ticker plus the exchange identifier (if applicable). When linking a news story to a ticker code, be sure to use the same symbol as listed by the exchange. Infront automatically matches the exchange ticker to the underlying feed.
Location of XML file:
The XML file containing the news must be put in a place on the Internet available to Infront, specified through a URL. Once initial setup is complete, the URL must not change, as this is a one-time configuration in our system.
Verifying your XML file:
An easy way to verify that an XML file is valid is by opening it in Internet Explorer. For example, opening the following file in Internet Explorer should cause it to complain about invalid XML format:
Invalid XML Example
Ensure that the user’s existing files are copied from their current location Document\Ontrade folder in to the new one.
Then ensure that the mapping is done properly in Windows registry settings, particularly the Personal setting here:
https://www.repairwin.com/change-personal-folders-location-using-registry-windows-8-7-vista/
The Personal Folders settings –per user- are stored at the following registry key:
- HKEY_CURRENT_USER\SOFTWARE\Microsoft\Windows\CurrentVersion\Explorer\User Shell Folders
Finally, the Ontrade.ini -file of each user should be modified after being copied to the new location, by removing or renaming the [FILES] section:
[FILES]
Cache=C:\Users\infront123\AppData\Local\Infront\Ontrade\Cache\
Workspace=C:\Users\ infront123\Documents\OnTrade\Workspace
Setup=C:\Users\ infront123\Documents\OnTrade\Setup
Portfolio=c:\Users\ infront123\Documents\OnTrade\Portfolio
Delete the whole section or rename it [_FILES] or update all the folders with the new path.
The terminal will re-create these paths using the Personal folder setting from registry the next time it starts up.
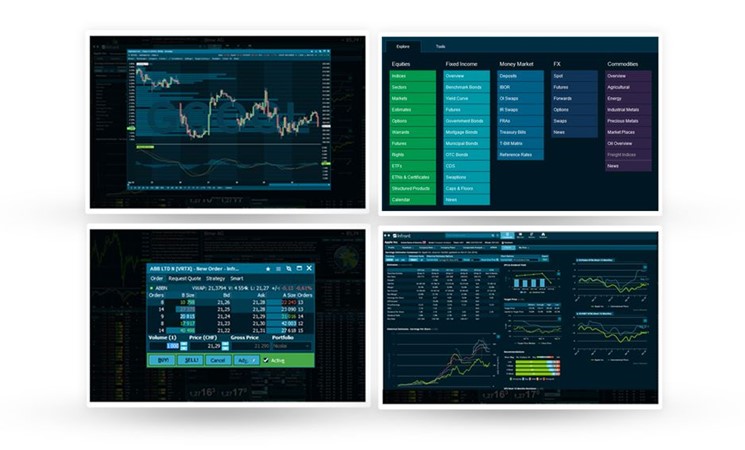
Trading
The Infront Professional Terminal can be enabled with electronic trading services towards selected trading partners. Whether you are looking for a mono- or multi-broker solution, The Infront Professional Terminal can be customized, streamlined and connected to your existing technology infrastructure and work-flow. To see all of our trading partners, click here.
For private investors Infront solutions, including Infront Active Trader and Infront Web Trader, can be used towards selected trading partners in Europe.
Infront trading solutions are implemented at numerous banks and brokerages around the world, enabling them to deliver cost-effective electronic trading services to their customers. Building on their existing infrastructure, powerful trading features in the Infront Professional Terminal and Infront Connect allow brokers to support trading at levels from retail users to advanced professional traders.
| Treading Feature | Description | Benefit |
|
Secure login trading |
A separate login is required to trade from the Infront Professional Terminal. Once logged in, you will have a secure connection to your broker or trading network.
|
Increased security |
|
Multiple Asset classes |
The Infront Professional Terminal can be set up to trade on any asset class, including equities, derivatives, FX, CFDs, fixed income, commodities, OTC instruments and more. |
Trade multiple asset classes from a single solution. |
|
Multiple venues |
The Infront Professional Terminal can be set up to trade on multiple trading venues, including exchanges, OTC venues, MTFs, RFQs and more.
|
Trade on multiple venues from a single platform. |
|
RFQ (Request for Quote)/ RSP Trading |
RSP Trading is a RFQ service (off-book) which is an alternative way of executing orders (on-book). |
Best execution, single fills, speed of execution and cost-effective alternative. |
|
Entering orders on Infront Symbol Dictionary |
Orders can be placed on data from the Infront Symbol dictionary in the Infront Professional Terminal.
|
Trade on more markets. |
|
Mono-broker functionality |
The Infront Professional Terminal can be connected directly to a brokers trading infrastructure via FIX or an open API. |
Trade via a single broker’s exchange membership. |
|
Multi-broker functionality |
The Infront Professional Terminal can be used as a multi-broker terminal, connected to the UL NET Trading network from ULLINK. |
Order routing to about 600 brokers on the UL NET NYFIX network. |
|
Limits and order validation
|
Using the Infront FIX trading gateway, order validation can be used to calculate portfolio margin and manage net-value limits – including Trading Power, Shorting and Credit .
|
Depending on trading accounts, all limits and validation can be performed by the broker. |
|
Trading preferences in front-end |
Set preferences for the behavior and appearance of trading windows, as well as for standard portfolios, volumes, values, order types, limits and more can be set easily in the Infront Professional Terminal. |
Get full control over trading preferences without involving technical resources. |
|
Trading keyboard shortcuts |
The Infront Professional Terminal allows important trading functions to be performed using keyboard shortcuts. |
Faster execution |
|
Trading via Infront Mobile |
Infront users can use their Infront login to access trading, portfolio(s), active orders and trades via Infront Mobile Apps. |
Access to trading via the terminal and on mobile devices with single login. |
|
Click trading |
The Click Trading Window allows you to enter an order with a click of the mouse. You can modify the order using drag-and-drop and can set pre-defined conditions, volumes and behavior. |
Rapidly place, modify and cancel orders with one click of a mouse. |
|
Basket Trading |
The Infront Professional Terminal allows you to import a list of orders on various instruments as a basket, or to define a basket manually. Set pre-defined templates for uploading baskets via Excel. |
Manage basket order more easily. |
|
Order monitor |
All orders and trades sent via an Infront trading gateway can be monitored in real-time and viewed by a user.
|
Follow the entire order and trade flow from all users. Access and manage the user portfolio directly from any monitored order. |
|
Account monitor |
Compliance function for monitoring all validated accounts in the Infront FIX trading solution.
|
The accounts can be sorted by trading power to find out which accounts require attention. |
|
Display of intraday and historical trades |
The Infront Professional Terminal lets a user view intraday and historical trades
|
Maintain a complete overview of intraday and historical trading activity. |
|
Trading status window |
The Infront terminal includes a Trading Status Window displaying all orders, trades, net trades and available portfolio(s).
|
Maintain a real-time overview of trading activity and performance. |
Supported order types
| Trading feature | Description | Benefit |
|
Single limit orders |
Single limit orders can be entered from any Market or Composite Window in the Infront Professional Terminal. |
Quickly and easily place single limit orders. |
|
Order with instructions |
Order instructions can be specified in the Infront terminal for Care Orders sent to a third party. |
Maintain complete control over order execution. |
|
Parent/child orders |
An order can be easily split into parent and child orders, and order status can be viewed in the Order Status Window in the Infront Professional Terminal. |
Maintain complete control over order execution. |
|
Slicing of orders |
The Infront Professional Terminal allows you to slice an order across various portfolios/accounts or brokers and specify the amount per order. |
Get increased control over order execution across portfolios and brokers. |
|
Conditional orders |
When entering an order, you can specify conditions such as stop-loss, trailing stop-loss and other variables. |
Get increased control over order execution. |
|
Algorithmic and conditional |
The Infront Professional Terminal supports full implementation of algorithms or strategies provided by a broker. |
Execute orders based on broker algorithms/ strategies. |
You want to place an order, either via New Order book or Click trading but the terminal keep asking you for Trading login. To avoid this, follow the instructions below:
Step 1: Go to the Main menu.
Step 2: Click on Tools → Trading → Open the Trading window.
The Trading window is the main window for trading where you will have full overview of all your orders, trades and portfolios you have access to.
Step 3: Select your Trading service à Type in your login information. This information is found in the email you received from your broker. If you do not have such information, please contact your broker.
Step 4: As long as you have the Trading window open, while placing orders, you will not be asked to login on your Trading service. Thus, you will be able to place orders even faster.
Note: You can also log in on your trading service via New Order window or Click-trading. However, everytime you close one of the windows, you need to log in again.
Note: You can also log in on your trading service via New Order window or Click-trading. However, everytime you close one of the windows, you need to log in again.
Dependent on what kind of terminal you have, you might need to add the click trader as an extra service if you do not have access. Please contact Infront or your broker if you want access to Click Trading.
If you have access to the click trading it can be found by right-clicking directly on a stock → Then click on Trading → Click Trading. You can also use the shortcut CTRL + K.
If your broker supports different algorithms, these will be available from the Strategy tab. The type of strategies that will be available will be dependent on your broker. Not all brokers have this functionality available.
Step 1: Open a New Order window for a stock.
Step 2: Click on Strategy → Find the available strategies in the drop-down menu under Strategy.
Price differs from private and professional investors due to exchange rules.
Private investor
A natural person (and not a corporation, partnership, proprietorship or any other entity whatsoever) who does not perform and is not in any other way engaged in giving investment services.
Professional investor
- A corporation, partnership, proprietorship or any other entity whatsoever is a professional user even if they do not run investment services.
- A natural person involved in giving investment services. The definition of “giving investment services” is: “Being authorized to give investment services or registered with SEC (or authorities with similar functions in other countries)”.
Please note
Professionals who identify themselves as Private Investors risk liability for all uncollected professional exchange fees, may have their data rights revoked and are in violation of federal law. The subscriber assumes all liability for declaring correct status as a Professional Investor or Private Investor and will be held accountable for all applicable penalties and / or exchange fees.
In order to get access to Top Investors, you must pay a professional exchange fee to the Stock Exchange which requires you to have an Infront Professional Terminal. This means that in order to get access to Top Investors, you must have an Infront Professional Terminal.
Please contact Infront if you want to learn more or subscribe to an Infront Professional Terminal.
Broker statistics are available for
- Copenhagen Stock Exchange,
- Stockholm Stock Exchange,
- Helsinki Stock Exchange,
- Toronto Stock Exchange
- Madrid Stock Exchange.
The availability is dependent on the transparency to the Stock Exchanges.
ULLINK and Infront are available to provide support on specific aspects of the solution. Please use the contact details below to ensure you receive help promptly:
Infront Customer Support: For Infront terminal and Infront Market Data
Support hours: 08:00 GMT+1 to 17:30 GMT + 1, Monday – Friday
Email: support@infrontfinance.com | Phone: +44 (0) 20 3829 5040
ULLINK Customer Support: For UL NET connectivity and Order Routing
Support hours: 07:30 GMT + 1 to 16.30 GMT + 1, Monday – Friday
Email: ulfront@ullink.com | Phone: +33 (0) 1 44 50 52 00
Login Needed to Access ULNET trading simulator
To place orders in the ULNET trading simulator, you will need a login from ULLINK. You will be contacted in a few hours after first download with login information.
Infront Market Data
- Infront Market Data coverage
- Exchange fees overview
Order Infront Market Data Online
To order additonal data please use "My Profile" in the Infront Professional Terminal.
Excel
Search for “Excel” in the «Find Anything» field in the Infront Professional Terminal and click on the result. You should then be able to choose “Install Excel add-in» and download the latest version of the Excel add-in. More information can be found in a separate Knowledge Base for Infront Analytics.
The Infront Professional Terminal can display live, streaming data or historical data from the terminal in Microsoft Excel. The rule of thumb is that if the column is available in the Infront Professional Terminal's market windows, custom lists or chains and there is data available, then you should be able to export this data to Excel. Both RTD (Real Time Data) and DDE (Dynamic Data Exchange) links provide access to the same information.
Infront can display live, streaming data or historical data from the Infront Terminal in Microsoft Excel. The rule of thumb is that if the column is available in Infront's market windows, custom lists or chains and there is data available, then you should be able to export this data to Excel.
Both RTD (Real Time Data) and DDE (Dynamic Data Exchange) links provide access to the same information. RTD, however, is a newer protocol that offers several advantages over DDE, including more flexibility and better performance and reliability.
System Requirements
• RTD requires Excel 2002 or later. For older version of Excel, use DDE links instead.
• The Infront terminal must be running in order for the RTD links to return any data; please make sure the Infront terminal has started and is completely logged in before opening any spreadsheets containing RTD links.
RTD Formula
An RTD formula consists of the following elements:
=RTD("ontrade.quotes","",feed code,symbol ticker,field name)
| ontrade.quotes | Infront's terminal application name for the quotes module. |
| feed code | The cell which contains the market feed code |
| symbol ticker | The cell which contains the ticker symbol |
| field name | The cell that contains the name of the field data to display |
In the below example, the formula is requesting the bid price for BMW on the Frankfurt Stock Exchange (XET):
=RTD("ontrade.quotes","","XET”,”BMW","bid")
All of the field names and market codes are available in the below document:
Step-by-Step RTD Linking
1. Open a Market window/custom list.
2. Right click on the column headings and choose "Select Columns". From the “Select Columns” window, you can add and delete column headings. These will be the fields you wish to export to Excel.
3. There are two ways to export to Excel using RTD links. The first step for both methods is to select the cells you want to be exported to Excel by holding down left click on the mouse and dragging the mouse across all of the data you want to export.
When you have highlighted your selection, you can export the selection to Excel following the below directions:
3.1 Open as Excel sheet
Left click on the Excel icon which appears to the top of the window. This will automatically open an Excel sheet with your selection. Alternatively, use the keyboard shortcut Ctrl + Shift + E when you make the selection.
If you click on one of the cells, you can see the RTD function used to get the data in the formula bar.
As you can see from the below, the formula uses cell referencing and is therefore dynamic and more flexible.
=RTD("ontrade.quotes","",$C6,$D6,F$5)
| ontrade.quotes | Infront's terminal application name for the quotes module. |
| C6 | The cell which contains the market feed code |
| D6 | The cell which contains the ticker symbol |
| F5 | The cell that contains the name of the field data to display |
3.2 Copy RTF Link
Right click the selection and choose Edit > Copy RTD Link. Alternatively use the keyboard shortcut Ctrl + R.
Paste into Excel and the highlighted selection will populate the Excel worksheet.
If you click one of the cells you can see the RTD function used to get the data in the formula bar.
Differing from the cell referencing method used in the 3.1 example, this method is hard coded and references specific feed codes and ticker symbols in the formula.
=RTD("ontrade.quotes","","LSE","AV.","bid")
| ontrade.quotes | Infront's terminal application name for the quotes module. |
| “LSE” | The cell which contains the market feed code |
| “VOD” | The cell which contains the ticker symbol |
| “bid” | The cell that contains the name of the field data to display |
RTD Cell referencing
One benefit of RTD links, is that it is like any other function in Excel. This means that RTD links support referencing to other cells (as can be seen in the section “How do I export data to Excel?).
An RTD formula consists of the following elements:
=RTD("ontrade.quotes","",feed code,symbol ticker,field name)
| ontrade.quotes | Infront's terminal application name for the quotes module. |
| feed code | The cell which contains the market feed code |
| symbol ticker | The cell which contains the ticker symbol |
| field name | The cell that contains the name of the field data to display |
With the following formula (cell F6) to get the Last price for an instrument:
| “ontrade.quotes” | Cell A1 |
| feed code | Cell C6 (LSE) |
| symbol ticker | Cell D6 (AV.) |
| field name | Cell F5 (last) |
The result is shown above, and any changes to the feed code, ticker symbol or field name we make in cells C6 (feed code), D6 (symbol) and F5 (field name) will be reflected immediately in cell F6.
In the following example, I change the symbol ticker from AV. to VOD and the description and last price reflect this change.
The feed name and different field names can be easily found by referencing the Excel document "Feeds and Field Codes" or alternatively, in the Infront terminal by adding “Feed exchange code” or any other field as a column to a market or custom list.
Dynamic dates for historical data
Export dynamic historical data from Infront terminal using RTD to Excel. This means that each date is dynamically updated every day.
**Please note that it is only possible to copy RTD links for historical data if you have an Infront Plus terminal. If you do not have Infront Plus, you can still use “Copy DDE Link” when copying historical prices.
Historical RTD Formula
A historical RTD formula consists of the following elements:
=RTD("ontrade.hist","",feed code,symbol ticker,"prices",row number,field name)
| ontrade.hist | The module in the Infront terminal where data is requested |
| feed code | The cell which contains the market feed code |
| symbol ticker | The cell which contains the ticker symbol |
| prices | Specifies pricing data |
| row number | The date for the most recent day available will be 0. If the row is 1, this will always be yesterday, row 2 will be 2 days ago etc. |
| field name | The cell that contains the name of the field data to display |
Step-by-Step Historical Data Export using RTD
1. Open a symbol overview. Navigate to the History tab.
2. Highlight the selection of data you want to export by holding down the left click on your mouse and dragging across your data selection.
3. Right click > Edit > Copy RTD Link (or use the keyboard shortcut Ctrl + R)
4. Paste into Excel:
In the below example, the formula is requesting the open price for BARC on feed LSE (London Stock Exchange) for the row 0 (the most recent date available):
=RTD("ontrade.hist","","LSE","BARC","Prices","0","open")
Static Historical Data by Date
Export static historical prices. This means that the data will not dynamically update every day, but rather be static and reference data on specific dates instead.
A historical RTD formula consists of the following elements:
=RTD("ontrade.hist","",feed code,symbol ticker,PricesByDate,date,field name,CW/ C/ "")
| ontrade.hist | The module in the Infront terminal where data is requested |
| feed code | The cell which contains the market feed code |
| symbol ticker | The cell which contains the ticker symbol |
| PricesByDate | Reference to a specific date in the formula |
| date | The date for which you want to view the data |
| field name | The cell that contains the name of the field data to display |
| CW | Copy data for weekdays only, do not copy weekends |
| C | Copy data for all days (including weekends) |
| “” | Copy data for all days excluding national holidays |
For example, in the below example, the formula is requesting the open price for BMW on feed XET (Frankfurt Xetra, Equities) for 20/04/2017:
=RTD("ontrade.hist","","XET","BMW","PricesByDate","2017-04-20","open","CW")
Using this method of exporting historical data, you can change the date to reflect the value of that specific date.
So for example, start by using cell referencing to reference a cell instead of a specific date in the formula.
Now, if I change the date in cell A1 from 20/04/2017 to 20/04/2016, the open price will change to reflect the open price on the new date.
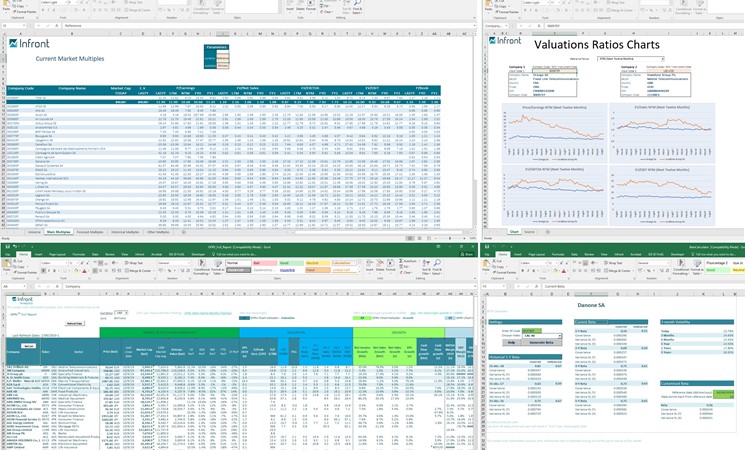
Excel Add-in
The Infront Plus terminal comes with an advanced equity and sector Analytics platform. Install the Infront Excel Add-in to utilize the full depth of equity fundamental information available in Excel.
Download the Infront Excel Add-in
To download and install the Excel add-in, type “Excel” into the Ctrl +F search bar and choose “Install Excel Add-in”. This will direct you to the Infront website and a set of instructions for installing the Add-in.
Infront Analytics Knowledge Base
Once you have installed the Infront Excel Add-in, you can access the Infront Analytics Knowledge base through the terminal to help you effectively use the Add-in. To access this, please following the below directions:
Main menu > Analytics > Help Center > Knowledge Base > Excel Add-In
Step 1. Open a new watchlist in the Infront terminal.
Step 2. Right click in the watchlist and choose "Edit → Import Symbols”.
Step 3. Select the Excel-file you want to import.
Step 4. The terminal will try to recognise each column, but if not please choose correct description. You need at least two identifiers (Market, symbol, ISIN, currency) to import correctly.
Step 5. Click the "Import" button.
#N/A means “Not Available” and this could be caused by different reasons.
This is a common Excel error that is not related to the Infront Professional Terminal, but a known problem that can occur in Microsoft Excel. We highly recommend you to run the Infront Professional Terminal before you open any Excel spreadsheets containing RTD links. This is necessary for the RTD links to work.
#N/A might appear if some files are not placed correctly according to the installation. Therefore, repairing Excel from the Control Panel could solve the issue. This can be done by following the instructions below:
- Click the Start button and open the "Control Panel."
- Click the "Uninstall a program" link under Programs.
- Scroll down and highlight "Microsoft Office."
- Click the "Change" button and wait for a new window to open.
- Click to select the "Repair" option and click "Continue" to authorize your computer to repair Microsoft Excel to its default settings.
The issue can also be related to the add-in options in Excel. You can also try the following:
Step 1: Go to file → Options → Add-ins.
Make sure that “ontrade.quotes” is shown as *active*. Make sure that the add-in is not placed under Disabled items. If it is disabled, try to activate it again.
Step 2: Make sure that you are running the latest version of Windows and that all updates are installed.
RTD stands for Real Time Data and DDE stands for Dynamic Data Exchange. Both these mechanisms provide access to the same information, however RTD is a newer protocol that offers several advantages over DDE, including more flexibility and better performance and reliability.
With RTD the data will update in real time and by default all the quotes are updated every two seconds.
API
Our solutions for End Of Day API can be seen here. Some other ways to access the API can also be seen in the following links:
Yes! We have solutions like RTD in Excel, please click here to read more.
- Infront Python API and Infront R API use “feed-code” and “ticker”. Example, Hennes & Mauritz B on Stockholm Stock Exchange = “Feedcode (SSE)” and “Ticker (HM B)”.
- Infront EOD API (End of Day) uses “Operating mic” and “ticker”. Example, Hennes & Mauritz B on Stockholm Stock Exchange = “Operating mic (XSTO) and “Ticker (HM B)”.
You can find all of the information above in the Infront Professional Terminal.
You can export ask, bid, last, turnover and volume over to R and Python.
Operating mic is the mic of the market, while the Mic is the mic of the instrument.
Packaging and Prices
Modules are available as an optional add-on package to the Infront Professional Terminal. We offer five different modules;
- Trading modules
- Equity Analytics Module
- Fund Module
- Treasury Module
- EOD Module
Trial access to the modules is also available. To request a trial or to add a module to your Infront subscription, please contact Infront.
Yes, if your broker supports credit card payment.
If your broker supports credit card purchase, you can order additional services via My Profile in the terminal with your card.
Remember: You'll be charged on a monthly basis for all services you purchase with your credit card, until you cancel your subscription.
Step 1: Open My Profile
Step 2: My Profile will display a New Services tab. You will see a list of all the services available for you to purchase. From here, the experience is similar to your favourite web shop: simply find the service you would like to add and click “Add to Cart”. When you’re finished, click “Checkout” on the shopping cart.
Step 3: You’ll be taken to a summary of your order and the amount that will be charged to your credit card. You’ll then accept the credit card agreement, and be taken to our payment service provider PayEx.
Once you’ve entered your details, you’ll be taken back to My Profile. Simply restart your terminal and you’ll have access to your new services!
You have to remove the package and re-subscribe in order to add the new credit card. You will not be charged twice.
Simply open My Profile to see a list of the subscriptions you subscribe to, and click the cancel link beside the one you’d like to cancel. The service will expire at the end of the month.
Which market data depths are available depends on several aspects including:
- Availability from the exchange
- Technical delivery of the data
- The amount of data.
The various market data levels available are:
Market By Level (MBL)
Market By Level data displays orders accumulated on price.
Level 1
Level 1 data includes only the first level in the orderbook with the best Bid and Ask and accumulated volumes displayed as Bid Size and Ask Size. Depending on the exchange the number of orders might also be available displayed for each side as orders in the Infront Professional Terminal. Level 1 data is accumulated on price.
Level 2
Level 2 data displays more levels of orders available in the market accumulated on price. Depending on the exchange the level of depth can be 5, 10 or 20 levels.
Market by Order (MBO)
Market By Order data displays all order available sorted on price.
Combined View MBL/MBO
With the Infront Professional Terminal you can take advantage of the Combined View of Market by Order and Market by Level orderbook. Each level can be expanded to display all underlying orders.
Consolidated Orderbook
The consolidated orderbook in the Infront Professional Terminal consolidates all orders (bases on ISIN, Currency and Asset type) into the same view and displays the venue (feed).
In 2014, the distributor of the Euribor (EMMI) changed the way of distributing quotes. As of 01.01.2014, everyone needs to have a direct agreement with EMMI to get real-time feed on Euribor interest rates. Click here to read more.
To get a direct agreement with EMMI, click here.
From 1 April 2011, your company is required to get an approval from Nasdaq in order to get access to the Index Weights data. This article explains how.
The purpose of this change is to adopt the industry standard of establishing and maintaining direct relationships with recipients of proprietary index weightings data. This change will help ensure that you are part of the index content development process, enabling you to provide feedback about the content and delivery of such information. Therefore, in order to continue receiving this data from Infront, you must submit an approval request as described below
Nasdaq Global Index Watch products
|
Product |
Monthly Fee |
Available from Infront |
|
Nasdaq US Indexes (including PHLX and Green Economy Indexes) |
$ 3,000 per firm |
Yes |
|
Nasdaq Green Economy Indexes (with SEDOLs) |
$ 300 per firm |
No |
|
Nasdaq Nordic & Baltic Indexes |
€ 835 per firm |
Yes |
|
Nasdaq Nordic Indexes |
€ 585 per firm |
Yes |
|
Nasdaq Baltic Indexes |
€ 250 per firm |
Yes |
|
Nasdaq Sharia Indexes |
$ 300 per firm |
No |
Step-by-step order request form
Step 1: Submit the “Global Index Watch Approval Request form”
Fill in the form found below and select your required products in the “Product Selection” form found here: http://www.nasdaqtrader.com/Trader.aspx?id=GIWReqForm
Step 2: Approval from Nasdaq
After submitting the form Nasdaq will handle your request and inform Infront within 48 hours.
Step 3: Permissions by Infront
When receiving an approval from the exchange Infront will enale all terminal users with the same Company name as stated in the form sent to Nasdaq.
Please note
Infront does not guarantee that the information herein is accurate. Clients wishing to verify prices or regulations are asked to contact Nasdaq directly.
Some exchanges and other vendors require that your company accept direct agreements in addition to your End User License Agreement with Infront. This article provides details on affected services and routines for accepting the relevant agreement(s).
Affected Services:
- NASDAQ US data for professional users
- NYSE US data for professional users (NYSE CTA, NYSE CTB, Openbook, Arcabook data)
- FTSE Index data for professional users
- NASDAQ OMX Index Weights
- DJ Institutional News (Premium)
- Infinancials Analyst
How to activate services requiring direct agreements:
Step 1: Add/order the data
To add any of the sources above please do one of the following:
- Send an order request from My Profile in the Infront Professional Terminal (requires access), or;
- Add from Infront Entitlement System (WebAdmin), or;
- Sign an Order form from Infront
The data/service will then be “pending” until the relevant agreement is accepted.
Step 2: Accept the Click-on agreement
- You will see the relevant contracts in either My Profile or WebAdmin
- Review, fill-in and accept the click-on agreement in My Profile
- The service will be activated (user access will go from Pending to Active) after the agreement is accepted
Step 3: Instant access
- Once the agreement is approved, please restart the terminal / Mobile app
- If you now go to MyProfile|Account you will see that the contract is accepted with the same date
Special conditions for FTSE, Nasdaq, Dow Jones and Infront Analytics
- FTSE: Access to FTSE real-time data. The average price for FTSE real-time data is 25GBP per user per month excluding VAT (price is an indication only). This fee comes in addition to the service fee to Infront.
- Nasdaq: Access to Index weightings. Please contact Nasdaq for more information(contact details below). This fee comes in addition to the service fee to Infront.
- Dow Jones News: Access to Institutional News (Premium). Dow Jones have opted for selling this news service directly (unlike the other Dow Jones news services offered through Infront) and a direct agreement with Dow Jones is needed to access this new feed in the Infront Professional Terminal. Please contact Dow Jones for more information(contact details below). This fee (EUR 155/month) comes in addition to the service fee to Infront.
- Infront Analytics: Access to Infront Analytics. Financial Intelligence Services (previously WVB) require a direct agreement which needs to be printed, scanned and returned to Infront before access to Infront Analytics is activated.
Based on the permissions and company information set in the Infront entitlement system, Infront will report the company name with details and the number of users to the vendor on a monthly basis. Based on this information, the vendor bills its clients directly.
For further information please contact Infront or the vendor:
Infront
Infront Client Services
FTSE Group
Daphne.Stead@ftse.com
+44 (0) 207 866 8999
Nasdaq
martin.kirby@nasdaq.com
+44 207 065 8027
Dow Jones
Markku.Suonmaa@dowjones.com
+46 8 545 131 16
The Cross Market Indicators package includes a selection of key indicators in real-time or delayed. For more information see here.
Infront provides the following data as part of the MTFs Europe package:
|
Feed Name |
Access |
Code |
|
Chi-X Europe, Stocks |
Realtime- Level 2 (20 MBL) |
CHX |
|
Turquoise, Equities |
Realtime- Level 2 (10 MBL) |
TQU |
|
BATS Europe, Stocks |
Realtime- Level 2 (20 MBL) |
BATE |
If you have an Infront Professional Terminal and access My Profile, you should add the following packages to get access to the various US market data:
|
Market |
Investor Type |
Package |
|
NYSE (Tap A), Equities- NYSE most active. |
Private |
US NYSE (CTA): NYSE Stocks- Level 1- Private** |
|
NYSE (Tap A), Equities- NYSE most active. |
Private |
US NYSE Openbook: NYSE Stocks- Level 2 add-on- Private** |
|
NYSE (Tap A), Equities- NYSE most active. |
Professional |
US NYSE (CTA): NYSE Stocks- Level 1- PRO** |
|
NYSE (Tap A), Equities- NYSE most active. |
Professional |
US NYSE Openbook: NYSE Stocks- Level 2 add-on - PRO** |
|
Nasdaq NM- Nasdaq most active |
Private/Professional |
US NASDAQ: TotalView** |
Notice: Level 1, level 2 and Total View give various levels in your order book.
If you do not have access to My Profile, please contact Infront. If you have another type of Infront terminal, please contact your broker for more information.
The Cross Market Indicators package includes a selection of key indicators in real-time or delayed. For more information see here.
From 9th of November 2020, Euronext Oslo Børs will change their policy regarding access to Index Weights data. If you still want access after this date, your company is required to get an approval from Euronext in order to get access. Private investors are not allowed access.
Pricing
Infront charges: none
Euronext charges: no official pricing. Priced case by case based on usage.
Step-by-step order request form
Step 1: Send an email to Euronext Oslo Børs to databyeuronext@euronext.com with CC to support@infrontfinance.com with "We request access to Euronext Oslo Børs index weights data through Infront". Make sure to include your company name and details.
Step 2: Approval from Euronext
After the email is sent, your request will be handled by Euronext.
Step 3: Permissions by Infront
When receiving the approval from Euronext, Infront will enable access to all terminal users with the same Company name as stated in the form sent to Euronext.
Please note
Infront does not guarantee that the information herein is accurate. Clients wishing to verify prices or regulations are asked to contact Euronext directly.
